
A magnetic door stopper is a simple, stylish way to prevent door slamming, protect walls, and keep doors open securely. Installing one is an easy DIY project that requires just a few tools like a screwdriver, drill, and level. Here's a quick overview of the process:
- Choose the installation spot: Measure 2-3 inches from the door edge and avoid areas with trim or molding.
- Mark the placement: Use a pencil and level to ensure accurate alignment.
- Drill pilot holes: Pre-drill holes to prevent surface damage.
- Attach the stopper: Secure the magnetic base and metal plate with screws.
- Test it: Open and close the door to ensure smooth operation.
Pro Tips: Use rust-resistant materials for durability, match the stopper's magnet strength to your door type, and clean contact points regularly for optimal performance. This simple upgrade enhances convenience and protects your space.
Magnetic Door Stopper Installation: Step-by-Step Guide
Tools and Materials Required
Installing a magnetic door stopper is a simple DIY project, but having the right tools and materials on hand makes the process much easier. Here's what you'll need to get started.
Tools and Materials You’ll Need
Must-Have Items:
- Magnetic door stopper kit (usually includes the stopper, mounting plate, and screws)
- Phillips head screwdriver
- Measuring tape
- Pencil
- Power drill with the correct drill bits
- Level (to ensure everything is aligned)
Optional Extras:
- Safety glasses
- Self-tapping screws (if you're installing on a metal door)
- Specialized tools for unique door types
What Each Tool Does
Knowing how each item helps during installation can save you time and effort:
| Tool/Material | Purpose |
|---|---|
| Magnetic Door Stopper | Keeps the door securely in place |
| Mounting Screws | Attach the stopper and plate firmly |
| Power Drill | Drills pilot holes to avoid damage |
| Measuring Tape | Ensures accurate placement |
| Pencil | Marks spots for drilling |
For metal doors, self-tapping screws are a good idea, as they eliminate the need for pre-drilled holes. Depending on your door’s material or design, you might also need extra tools to customize the installation [1][2].
Opt for durable, rust-resistant materials to make sure your installation lasts. Most kits come with everything you’ll need, including screws and mounting hardware [1].
Once you’ve gathered your tools and materials, you’re ready to move on to the installation process. Let’s get started!
sbb-itb-7d66a95
Installation Steps
Ready to install your magnetic door stopper? Follow these steps carefully to make sure it’s secure and works perfectly.
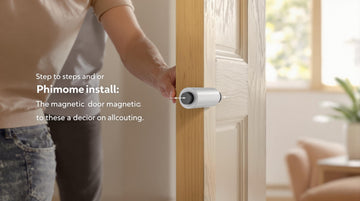
1. Choose the Right Spot
Measure 2-3 inches from the edge of the door and pick a spot that lines up with the existing hardware. Avoid areas with trim or molding. If your door is metal, keep in mind that the magnetic strength might vary depending on the door’s material thickness.
2. Mark the Placement
Hold the stopper where you plan to install it. Use a level to ensure it’s straight, then mark the screw holes with a pencil. Double-check your measurements to avoid mistakes. Make sure the marks are clear and accurate.
3. Drill Pilot Holes
Pre-drilling is key to avoiding damage and ensuring a secure fit:
- Pick a drill bit slightly smaller than the screws.
- Drill holes at the marked spots.
- Keep the drill at a 90-degree angle to the surface.
- Clear away any debris from the holes.
Pro Tip: Start with a small pilot hole and gradually make it larger to protect the surface.
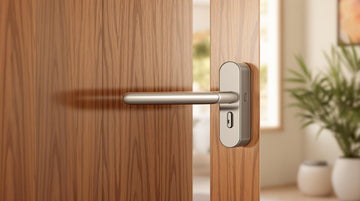
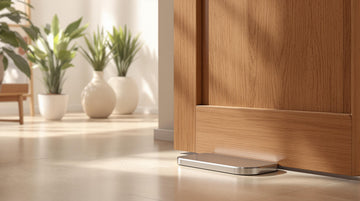
4. Attach the Stopper
Secure the mounting plate to the wall or floor and the magnetic catch and strike plate to the door using the screws provided. Tighten the screws firmly, but don’t overdo it - over-tightening can strip the holes or damage the hardware.
5. Test It Out
Open and close the door to make sure the magnet holds well and everything operates smoothly.
With your magnetic door stopper in place, you’re all set. Keep these steps handy for future projects or adjustments[1][3].
Additional Tips
To get the most out of your magnetic door stopper and ensure it lasts, keep these tips in mind.
Door Type Compatibility
The material of your door plays a big role in how well it works with a magnetic stopper:
- Wooden doors: Standard magnetic stoppers are usually a good fit.
- Metal doors: Thicker materials may need magnets with extra pull strength.
- Glass doors: Use specially designed magnetic plates that attach securely without risking damage to the glass.
Choosing Magnet Strength
Picking the right magnet strength is key for reliable performance. Here's a quick reference:
| Door Type | Recommended Magnet Strength | Notes |
|---|---|---|
| Light Interior Door | 5-10 pounds pull force | Standard setup works fine. |
| Heavy Exterior Door | 15-20 pounds pull force | Use additional mounting screws. |
| Glass Door | 8-12 pounds pull force | Adhesive mounting required. |
| Metal Fire Door | 20+ pounds pull force | Ensure compliance with building codes. |
For high-traffic areas or commercial spaces, go for industrial-grade stoppers with a pull force of at least 20 pounds. These are built to handle frequent use without wearing out.
A few extra pointers:
- Choose models with protective covers to avoid pinching hazards, especially if you have kids or pets.
- Avoid magnets that are too strong - they can damage surfaces or make doors difficult to open.
- Regularly clean the contact points, tighten screws, and pick magnets that match your door's weight and material.
Conclusion
Quick Recap
Now that you've gone through the steps, here's a quick rundown of the process. Installing a magnetic door stopper is a simple DIY task that involves five key steps: choosing the right spot, marking it accurately, drilling the holes, securely attaching the stopper, and testing how it works. When done properly, this stopper will help keep your door in place and protect your walls from damage.
Final Thoughts
With these tips, your installation can be smooth and effective. Magnetic door stoppers are a practical and stylish addition that enhances convenience. Make sure to check the manufacturer's instructions for any specific details related to your product.
This small upgrade not only safeguards your walls and doors but also helps cut down on future repairs. A proper setup ensures it works well for a long time.